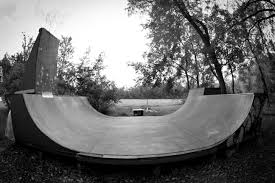
Instructions
A)Planning
- Decide on the kind of plan you want. You can buy inexpensive plans to build a skateboard mini-ramp, or sketch out your own plans.
- Plan the size of the skateboard mini-ramp to build. Most mini-ramps are 8 feet wide and a bit over 2 feet tall.
- Find a large workspace for your plans and tools.
B)Building the Sides
- Place a piece of 3/4-inch plywood on a flat surface. Draw a straight line up the right-hand side, measuring to the highest point of the mini-ramp. This is usually about 24 to 28 inches.
- Draw another straight line out to the left toward the center of your plywood board, measuring about 2 feet. This is the deck.
- Sketch a straight line along the bottom of the skateboard mini-ramp, about 5 feet. This is the bottom of the mini-ramp.
- Connect the top of the deck to the endpoint of the bottom using a curved line for the ramp. It is a good idea to use a half-circle drawing tool so the curve is true.
C)Finishing the Mini-Ramp
- Cut along the lines using a skil-saw so the curves are smooth.
- Repeat on a second piece of plywood for the other side.
- Connect the two sides with 2-by-4's. Make sure they are at intervals frequent enough to support the mini-ramp.
- Use a single sheet of 3/8-inch plywood for the actual mini-ramp section, bending it to fitover the curve.
- Finish rough edges.


